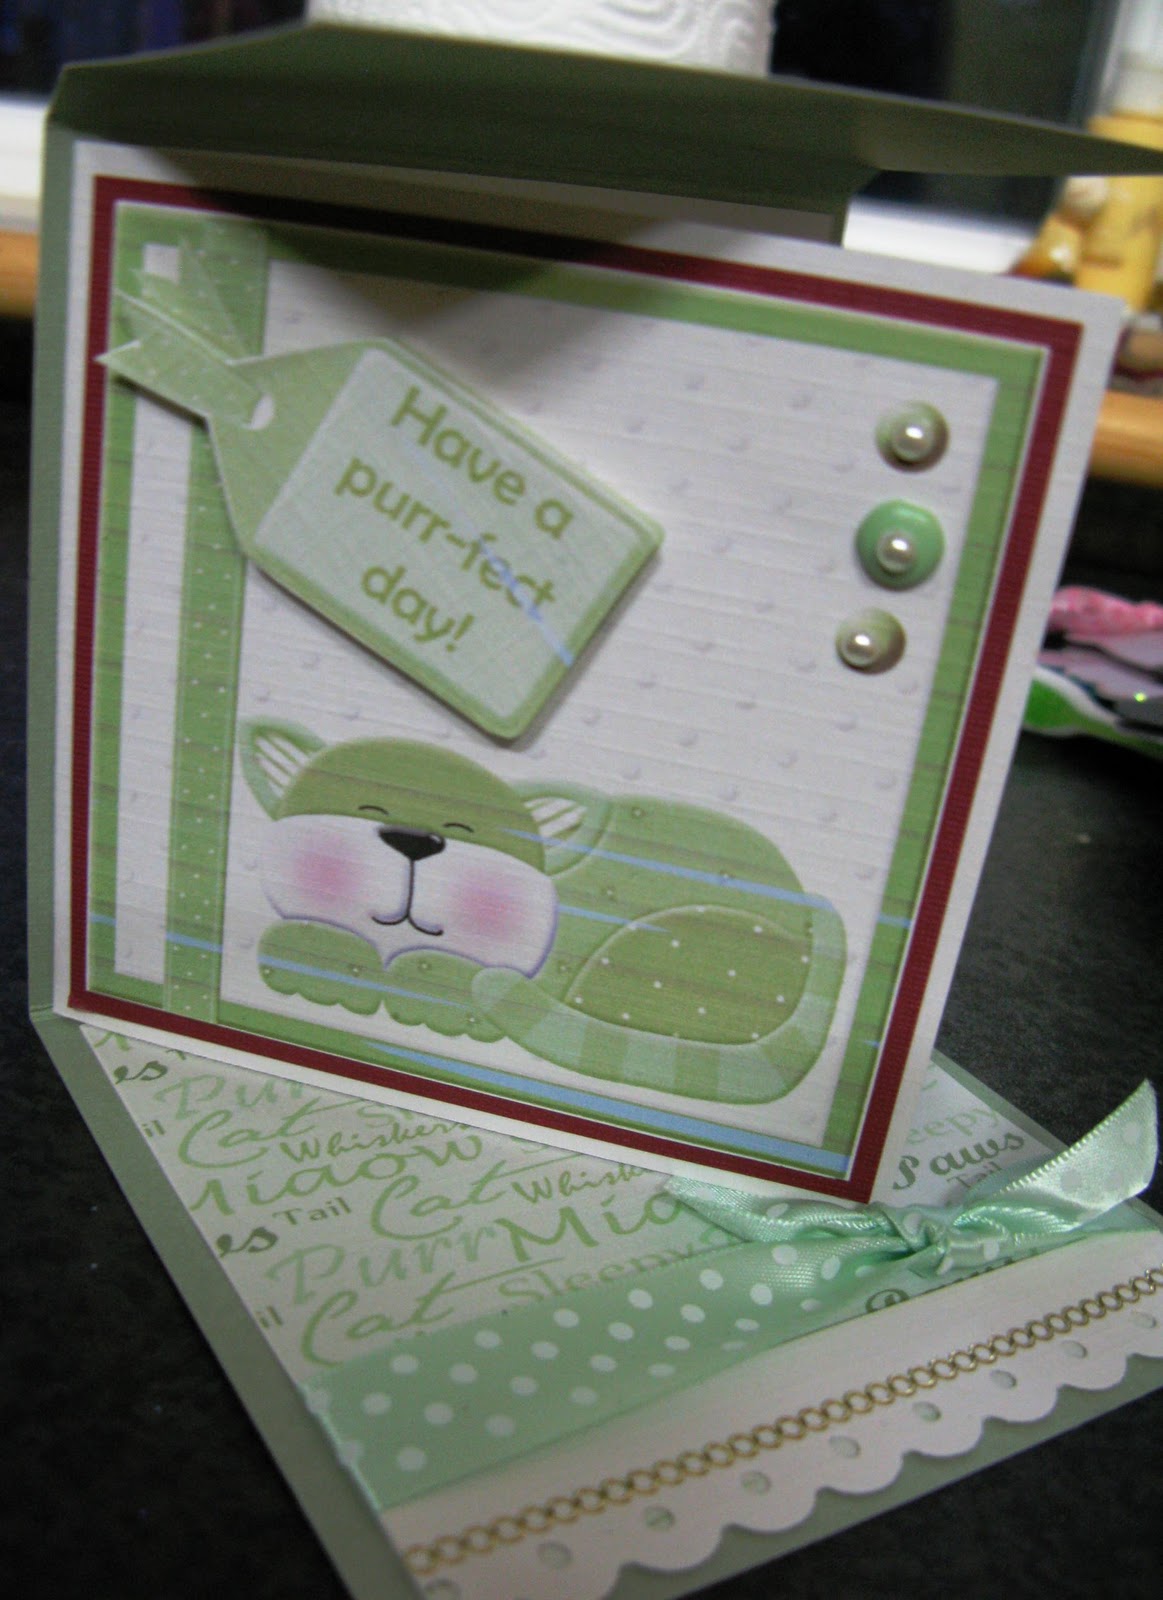
You did. Are you swooning too? You didn't? Well - loookee here - sassafrass new yummy stuff
And just in case you need a peek - here's the gorgeous vintage brooches, these are my fave.
You can use them on cards, pages, handbags, keyrings, necklaces, dangle them from your car mirror, put them around a vanity mirror, on picture frames (can you tell I'm loving these?) - these are far too good for even me to hide in my stash. Although I might just keep some in my bedroom - so I can keep an eye on them and unlike the real thing, they wont make me sneeze!
Friday, 30 July 2010
Plush Pals -not just for babies!
Given my penchant for baby makes using my Plush Pals dvd, you'd be forgiven for thinking that was all it could do. Truth is, I like making baby stuff but this disc will go far beyond baby cards. I've done some simple flower cards - all I did was insert a backing paper into my document and then inserted a flower on top. I then flood filled the flower with white to create a flower shaped "hole" in the backing paper. I printed this off , folded and cut into a square card.
Next I used the ready to print flower embellishment sheet, I cut out the flowers and look how different you can make the flower look just by pinching the tips of the petals together. You can then play with flower layers and positioning to create different looks - if you add distress inks, you get a softer more aged look, glitter adds a lot of sparkle - perfect with white card.
Something I'll be playing around with some more, the basic elements would make a lovely 3d frame too.
I also want to say I really appreciate people who take time to leave comments, I know how busy life is but I have had switch to moderation mode as I am fed up of deleting irrelevant and gobble-de-gook comments.
Next I used the ready to print flower embellishment sheet, I cut out the flowers and look how different you can make the flower look just by pinching the tips of the petals together. You can then play with flower layers and positioning to create different looks - if you add distress inks, you get a softer more aged look, glitter adds a lot of sparkle - perfect with white card.
Something I'll be playing around with some more, the basic elements would make a lovely 3d frame too.
I also want to say I really appreciate people who take time to leave comments, I know how busy life is but I have had switch to moderation mode as I am fed up of deleting irrelevant and gobble-de-gook comments.
Thursday, 29 July 2010
hougie board demo
Friday 7th August and I'll be in Spiddal, to give a Houghie board demonstration - it's straight after the coffee morning and kicks off the Spiddal Summer Extravaganza weekend plus I've heard there will be some great 12 by 12 offers to be had and of course the Houghie.
I think it's a great piece of kit - I have mine for a while and to be honest, as first I wondered had I made an expensive mistake but now it's invaluable. I can follow tutorials in both metric and imperial, which saves so much time - compared to translating it over onto my blue board.
Once you start to play with the board, fancy box making becomes really easy, I use a pad of A3 paper from the 2 euro shop to practice on (I hate wasting my good card making mistakes) or A4 copy paper - I've started to keep these "try outs" so that I am not always starting from scratch and I find the visual much easier to work with than just written instructions.
I have about 20 boxes and cards to show so far, and a couple more to complete if I find the time, I also have to prep for 2 classes - my house is awash with paper trimmings, which are been scattered far and wide by 2 rambunctious kittens and two equally rambunctious children. I had to take a break to wade through the detritus in the girls bedroom, how can 2 little people make sooooo much mess?
Anyway, see you in Spiddal Friday 7th - there be cake for sure .... and cake boxes ....
I think it's a great piece of kit - I have mine for a while and to be honest, as first I wondered had I made an expensive mistake but now it's invaluable. I can follow tutorials in both metric and imperial, which saves so much time - compared to translating it over onto my blue board.
Once you start to play with the board, fancy box making becomes really easy, I use a pad of A3 paper from the 2 euro shop to practice on (I hate wasting my good card making mistakes) or A4 copy paper - I've started to keep these "try outs" so that I am not always starting from scratch and I find the visual much easier to work with than just written instructions.
I have about 20 boxes and cards to show so far, and a couple more to complete if I find the time, I also have to prep for 2 classes - my house is awash with paper trimmings, which are been scattered far and wide by 2 rambunctious kittens and two equally rambunctious children. I had to take a break to wade through the detritus in the girls bedroom, how can 2 little people make sooooo much mess?
Anyway, see you in Spiddal Friday 7th - there be cake for sure .... and cake boxes ....
Wednesday, 21 July 2010
acetate plush pals card
I was asked to make this for a little baby boy - it uses some of the backing papers, the embellishment flower sheet and the blue teddy decoupage sheet from "Plush Pals". So once I had the sheets cut the card itself did not take too long - I find it great for commission cards as I have no thinking to do (believe me, that can take a LONG time!). Then I added a little matching vest as well, they cost so little to make and make such a personal little addition - there's a candle as well but I haven't finished the wrapping yet.
This is one of the cards that we'll be doing at the August 7th class in Kilcolgan - but using a different colour theme and character. (I know you like a preview Catherine!)
Friday, 16 July 2010
Fimo card accents
I was in An Siopa Bui last week doing a Fimo demonstration for Staedtlar - the weather was a total washout but we had a fun day playing with this extremely versatile polymer clay.
I was primarily using Fimo soft - a great introduction to the medium, as the name implies it is softer and easily modelled than the classic (more suited to jewellery applications - although I have made beads, brooches etc using fimo soft). It comes in a huge array of colours which are then blendable so that you can create any colour imaginable and there are glitter and metallic options. For cardmakers, Fimo makes great accents and can be coloured and mixed with many of your other craft materials - I add ultra fine glitter, paint it with acrylic paint, blend on alcohol inks, colour with chalks, distress inks and pearl-ex. When I have finished a project I squash up all the bits and then make little flowers, I then colour them with gold and silver pearl-ex and add a bit of green promarker onto the leaves. Nothing is wasted.
Anyhow, here's a couple of quick cards using fimo embellishments - I'll post the rest of fimo creations soon.
I was primarily using Fimo soft - a great introduction to the medium, as the name implies it is softer and easily modelled than the classic (more suited to jewellery applications - although I have made beads, brooches etc using fimo soft). It comes in a huge array of colours which are then blendable so that you can create any colour imaginable and there are glitter and metallic options. For cardmakers, Fimo makes great accents and can be coloured and mixed with many of your other craft materials - I add ultra fine glitter, paint it with acrylic paint, blend on alcohol inks, colour with chalks, distress inks and pearl-ex. When I have finished a project I squash up all the bits and then make little flowers, I then colour them with gold and silver pearl-ex and add a bit of green promarker onto the leaves. Nothing is wasted.
Anyhow, here's a couple of quick cards using fimo embellishments - I'll post the rest of fimo creations soon.
Wednesday, 14 July 2010
digital papercrafting and a bit of distress
Digi is Huge this year, I wonder what it has done to worldwide patterned paper sales - I've bought one measly 6 by 6 paper pack this year so far, partly because I have enough paper to fashion a full scale replica of the Eiffel tower should I ever be so inclined or so talented and mostly because there is a slew of digital papers available - even BG are selling digi files of their back catalogues. Brilliant news for anyone working on albums were you might want more than a couple of sheets of one design - all we need are huge quantities of good decent white cardstock and gallons of ink, which if you use original cartridges is priced more expensively than liquid gold.
But if you are buying patterned paper check out 3 bugs in a Rug - fresh and funky designs for both scrapbooks and cards. What CHA releases are you watching? I love Spellbinders Lacey Squares and the accucut scrapbook albums (oh wishlist - wishlist)
Anyhow, I am a digi fan but if you leave it at print and cut , it can look a bit flat - but add a bit of distress ink (or any ink for that matter) and some ribbon - I just don't get digi ribbon! And you're nearly there.
Polish off with some glitter (slowly coming around to it in little pinches...), ink a few flowers and overstamp for a bit of detail. And a flat sheet can come to life ....
This is a little preview for my 4 ways for distress class in August - trying to get ahead!
But if you are buying patterned paper check out 3 bugs in a Rug - fresh and funky designs for both scrapbooks and cards. What CHA releases are you watching? I love Spellbinders Lacey Squares and the accucut scrapbook albums (oh wishlist - wishlist)
Anyhow, I am a digi fan but if you leave it at print and cut , it can look a bit flat - but add a bit of distress ink (or any ink for that matter) and some ribbon - I just don't get digi ribbon! And you're nearly there.
Polish off with some glitter (slowly coming around to it in little pinches...), ink a few flowers and overstamp for a bit of detail. And a flat sheet can come to life ....
This is a little preview for my 4 ways for distress class in August - trying to get ahead!
Tuesday, 13 July 2010
3d card for class
So here's my last card for Saturday's workshop - it's a double pop up that all folds flat to fit a 150 mm square envelope. To be accurate the lion is a "prop up" rather than a pop up - and he's from the Plush Pals dvd, as is the sentiment and patterned paper. The lion has copper stickles on his mane - I had to be so patient waiting for it to dry and I want to make him a tassel tail but I can't find them at the minute (story of my life) and I'd love to try him in pink or blue for a new baby card - maybe later.... Other than that the stars are nestabilities, the card and metallic card DCWV and I added a bit of gold peel off and some odd buttons.
My first challenge for a long time - Bee Crafty - 3d challenge and check out the new bee in town - such a little cutie!
Sunday, 11 July 2010
back in business .....
So it's been a while since I blogged - basically I got too far behind in other things that cardmaking and blogging became a chore and I just had to stop to find a bit of balance.
Anyhow yesterday found me at An Siopa Bui doing a fimo demo for Staedlar, it absoloutely poured from the heavens, which kept some people away but I had thoroughly pleasant day modelling spiders, monsters and doughnuts with the young ones and showing some techniques and simple embellishment ideas with the regular cardmakers. Whilst three little girls went home with the sparkliest silver roses to bake in the oven - pearl-ex works miracles on discoloured fimo!
I'll post some pics of some of the stuff when I get chance, truth is everything is still in the car as I spent today organising cards for my little Limerick class next week. We are doing advanced Plush Pal cards and here's a peek at two of them - a little cat in a canopy card and a big lamb with hexagonal gift box. Did you notice I used peel offs? Twice! I can't believe it - mainly I had to use them because my scallop border punch broke, boo hoo - 4 springs and plastic is all I have left ....
There's a pop up card to join this trio too, I just haven't made it up yet. If anyone is interested, I do have space for one more to join our workshop (possibly 2) - I supply all the kit and pieces, you bring your basic crafting kit - this class is suitable for all levels of crafter. Saturday 17th July 11am to 3pm and costs €20. E-mail boxercreations@gmail.com if interested or find me on Facebook if you know how! (I'm new to it and don't know anything...)
Anyhow yesterday found me at An Siopa Bui doing a fimo demo for Staedlar, it absoloutely poured from the heavens, which kept some people away but I had thoroughly pleasant day modelling spiders, monsters and doughnuts with the young ones and showing some techniques and simple embellishment ideas with the regular cardmakers. Whilst three little girls went home with the sparkliest silver roses to bake in the oven - pearl-ex works miracles on discoloured fimo!
I'll post some pics of some of the stuff when I get chance, truth is everything is still in the car as I spent today organising cards for my little Limerick class next week. We are doing advanced Plush Pal cards and here's a peek at two of them - a little cat in a canopy card and a big lamb with hexagonal gift box. Did you notice I used peel offs? Twice! I can't believe it - mainly I had to use them because my scallop border punch broke, boo hoo - 4 springs and plastic is all I have left ....
There's a pop up card to join this trio too, I just haven't made it up yet. If anyone is interested, I do have space for one more to join our workshop (possibly 2) - I supply all the kit and pieces, you bring your basic crafting kit - this class is suitable for all levels of crafter. Saturday 17th July 11am to 3pm and costs €20. E-mail boxercreations@gmail.com if interested or find me on Facebook if you know how! (I'm new to it and don't know anything...)
Thursday, 20 May 2010
An Siopa Bui Class News with sneak peeks
My next An Siopa Bui class in now only just over a week away and I'll be busy with my class kits next week. Kerry has really set me a challenge and I'm cramming in 5 totally unque and new projects in over the course of the whole day.
Sunday 30th May starts 10.30am and we'll be there til it's done!
The day has 2 quite distinctive halves with the morning session being dominated with Tim Holtz distress inks - I love, love, love Rusty Hinge from the new range but there will be a choice of colours for you to find your favourite.
The morning kicks off with a 6 inch square clock. Richard made the blanks for these and I have to say, made a super spanking job of them - they have a lovely bevelled edge and the clock is well set into the square ( I couldn't get it apart for love nor money!). Super smooth surface takes the ink really well and you can the layer the colour up and then overstamp like a dream. Adorned with Sizzix die cuts using more distress and smooch it up with some spray inks and of course there's some pearls and flowers, there's always flowers ..... and a bit of embossing - and oodles of creative freedom to make your own thing.... then we "flow" into an inky distress card with more die cuts, more ink and flowers with yummy Tim Holtz adages.
At this point you might be thirsty - so there might be time for tea and a biccy, just one mind....
While we have the ink out we'll lash into the new sixxiz cut and score dies - I can't wait to see this one - a nifty ATC/business card holder and cut from chipboard with clear embossing means it will be strong enough to cope with the rigours of handbag life!
Do you want your lunch now? Ok - go on, be quick.....
A different direction with a desktop box and 4 cute little cards then a really cute giftbox and card from the divinely lovely and cute Plush Pals dvd.
Now is that enough for you or are you staying for more.....
Monday, 17 May 2010
Bee Crafty - new challenge
Hurray Bee Crafty extended their challenge or I'd have missed the deadline - I made the stuff but never found time to post it.
I've used the oh so nifty plush pals dvd and my fave editing option Publisher to customise my box top and make the little t shirt transfer thingies (my vocabulary is shot today - what's the word I want?).
As well as being packed with ready to print cards, decoupage and projects there is also a folder containing the files in jpeg and png format, so the options are truly endless.
The T-shirt transfers are a really cute and cheap way to customise baby and kids gifts - I cut mine down to A5 size which then easily fits 2 fairly large motifs - yay, that's the word! So at €7.99 for 10 A4 sheets, that's a lot of customising for not a lot of dosh.
The box top is simply printed and then I decoupaged some of the letters and added a bit of glmour dust for sparkle - the flower is from MME decoupage pad with distress inks to alter. There is room in the box for another little gift but I haven't made that yet, so watch this space for more soon!!!
A few more challenges for this little box and vest - digidoodleshopsbest.blogspot.com ribbon challenge
RES Q challenge - my kiwi green cat!
Pixie Dust Studio Challenge Cut it out.
Subscribe to:
Posts (Atom)